
Tips for enhancing the original Peak.
The Peak one is a great kite. So rare does the first release of anything work out as well as the first Peak. And although there's a new Peak2 released IT IN NO WAY DIMINISHES THE QUALITY AND PERFORMANCE OF THE PEAK 1.
But that said as with many kites, there are things that can make a great kite even "better" depending on your needs and tastes. We set up this page as a resource for snow kiters looking to get a little more out of their given size of Peak 1. Small additions that make substantial changes in the Peak 1's performance and allow for easy tuning for various wind conditions without the added bulk of more complex dynamic adjusting systems.
NOTE: Flysurfer does not recommend or endorse these modifications in any way and though we have had no negative affects from these mods (we love them actually) you install them at your own risk and are ultimately responsible for any damages or injuries that may occur as a result of changing the stock configuration of your PEAK kite.
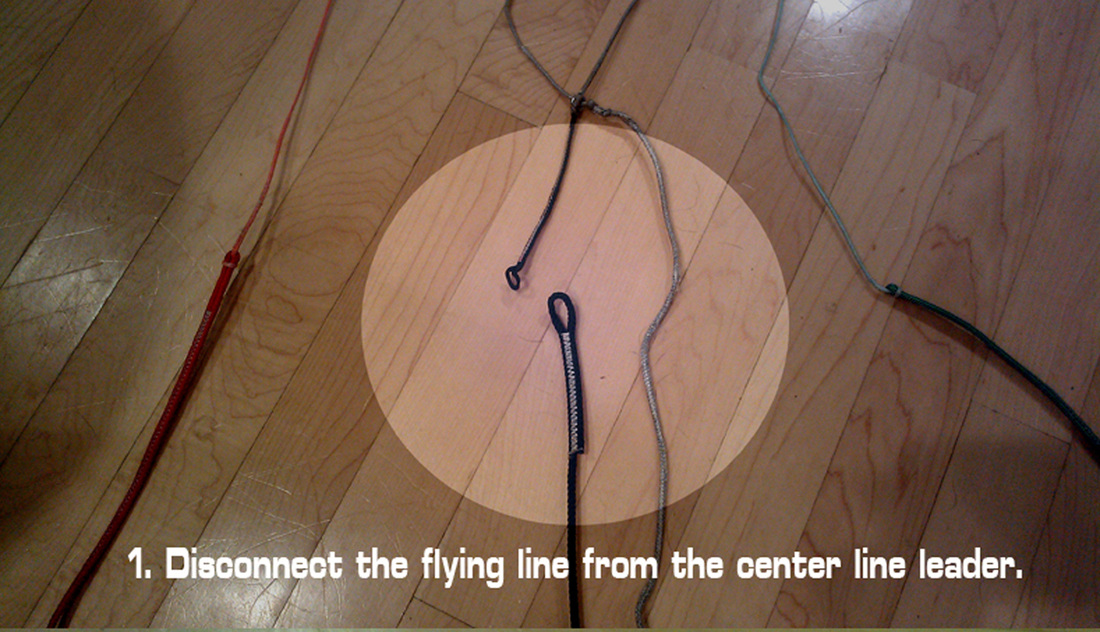
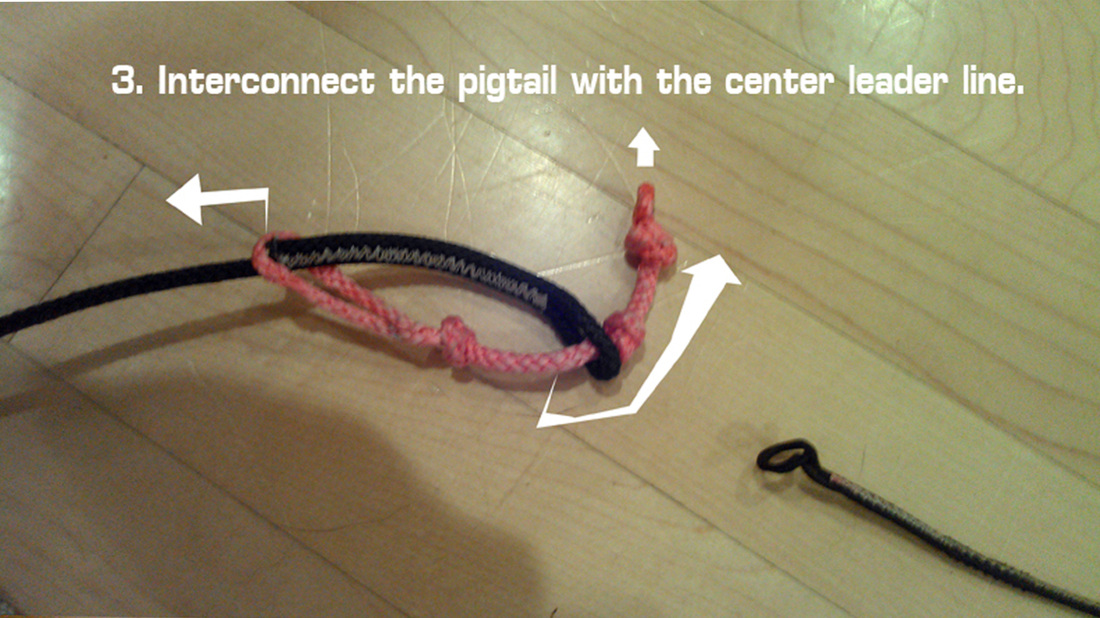
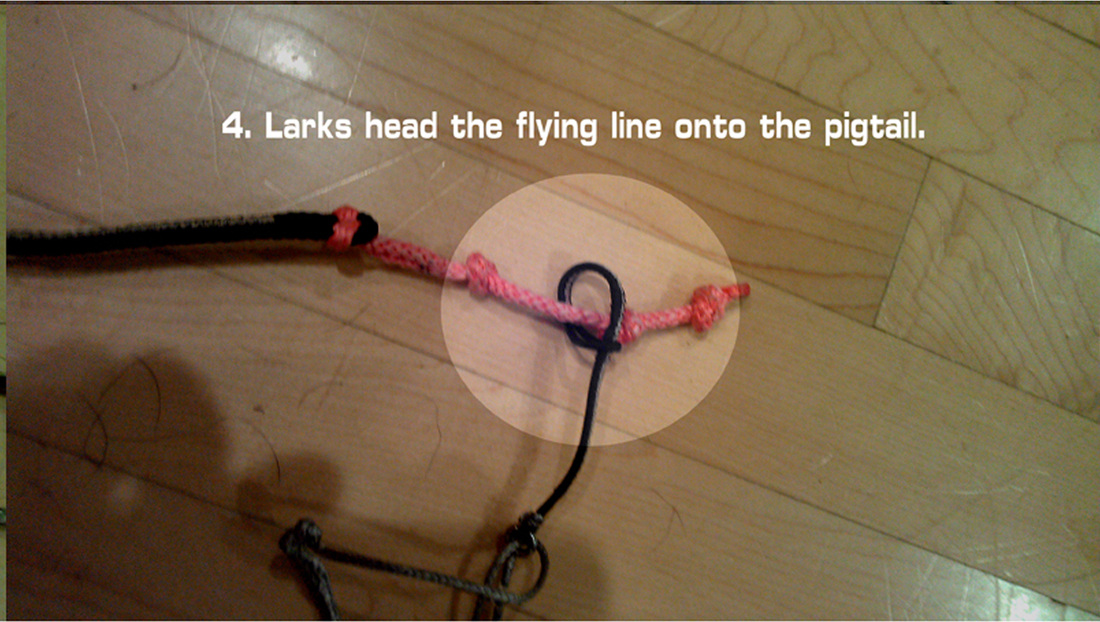
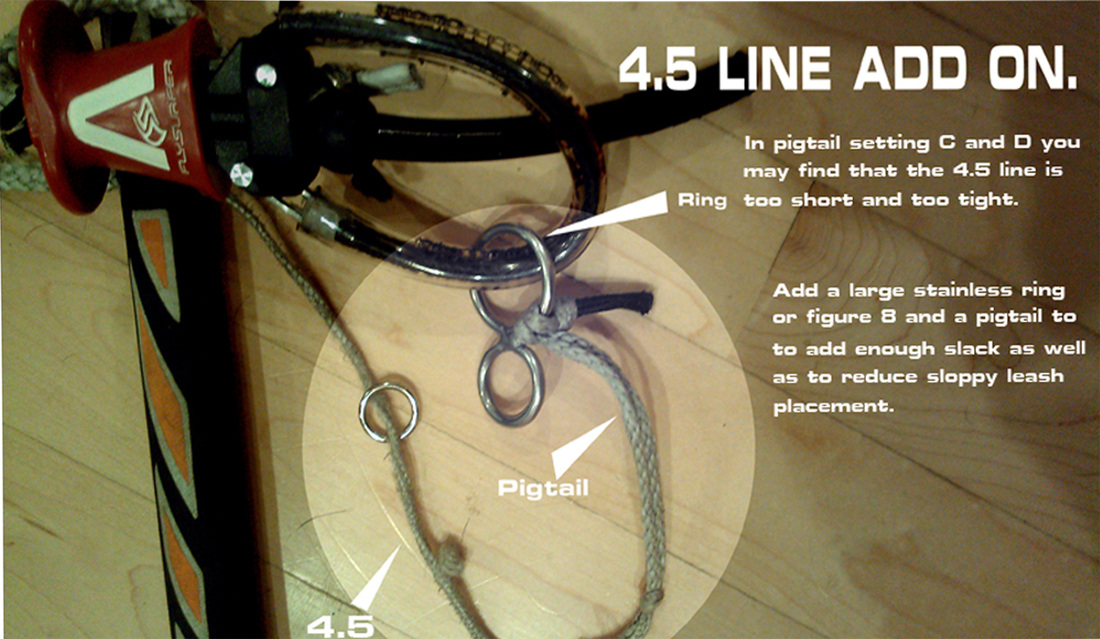
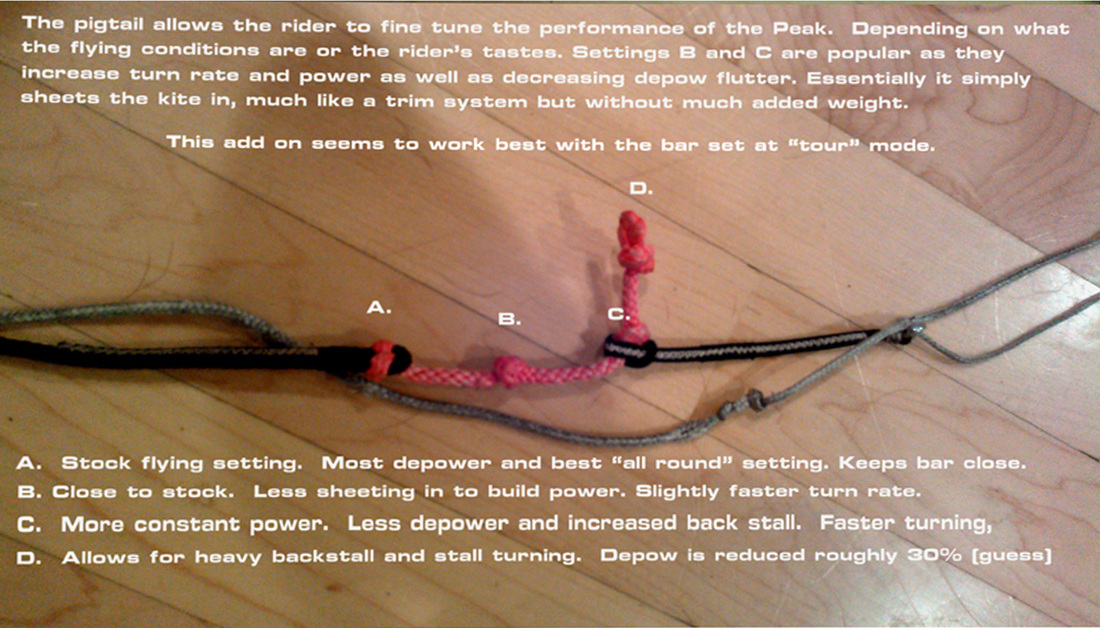
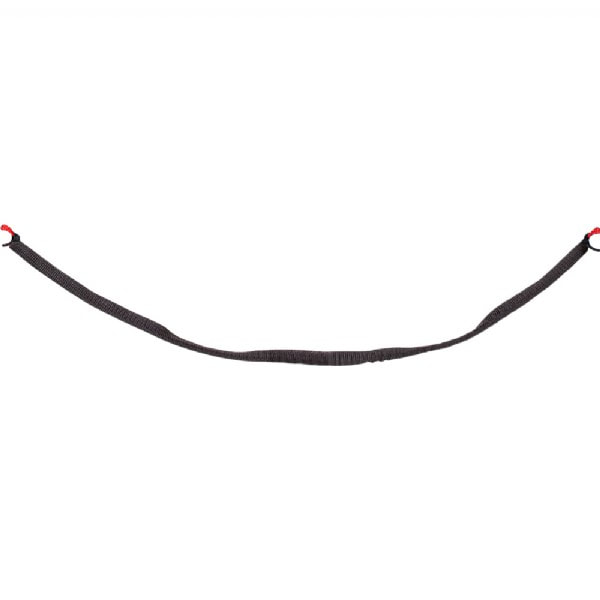
Front line leader Pigtail extension. (aka HWK Peak Performance Mod)
By adding a 3" (76mm) pigtail with knots every 1" (20mm) you can enhance the low end wind range and turn rate while reducing flutter. In simplest terms you are essentially adjusting the kite to be in a state of sheeting in. This is extremely helpful in light wind situations. Be mindful of the fact that while you adjust the kite on the pigtail for more power you are also sacrificing some of the PEAKS's depower. However, you are likely to do this in lighter wind situations where power is the priority and most would agree even with the kite set at the optimal knot for power the PEAK still has more than enough depower available. Click on the images below to enlarge for more details.
|

|
|
|
|
|
About that knot...
"There's a knot in one of my lines. what do I do?"
We have received several calls from owners with new Peaks about a knot that they have found in their lines. The knot is in the thick flag out line on the Front Line Safety system.
The knot is supposed to be there and is installed during production. DO NOT REMOVE THE KNOT. :-)
Line Extensions.
Line extensions are another great way to get more low end out of most kites. It seems to really make a difference with the PEAK1. We've been using mostly 5m line extensions on our Peak1's. It allows for more power in less wind as well as getting the kite high enough at times to get over the turbulence in tighter flying areas. We offer lines and line extensions on our Small Parts and Accessories section of this site.
Conversely, in high wind situations you can double back the lines that come on your Peak to reduce the power considerably. Simply disconnect the lines from the kite, connect those ends at the bar with the other ends and then larkshead the middle of the lines to the kite. This reduces power but also reduces the space required to fly the PEAK1. A great option for getting out of overpowered conditions or for street/urban kiting.
Conversely, in high wind situations you can double back the lines that come on your Peak to reduce the power considerably. Simply disconnect the lines from the kite, connect those ends at the bar with the other ends and then larkshead the middle of the lines to the kite. This reduces power but also reduces the space required to fly the PEAK1. A great option for getting out of overpowered conditions or for street/urban kiting.
Brakeline Crossover Handle.
Many snowkiters are familiar with and used to having some type of Brake Crossover Handle to backstall land their kites. Ozones, HQ, Peter Lynn, all use these. It is a handy and effective way to bring a kite down in the landing areas. This is an image of what one looks like. Usually there is a small loop in the center that allows the brake to be anchored in a neutral position and eliminate any left/right brake bias that would cause the kite to be unstable while secured. The Crossover would be affixed to both rear lines just above the balls used for landing and reverse launching.
Stall Handle/Brake Crossover
Used to operate both back lines (AKA Brake lines) as a single unit. Can be used to stall and land, to reverse launch or to secure to an anchor in a landed/stalled position. Our stall handles are 23"+ in length to accommodate a wide range of bar lengths. They may need to be shortened for use on short bars.
With stitched webbing over the crossover line to supply comfort to your hands when stalling and a PVC coated centering stake out loop this is a much, MUCH nicer option than some clunky home made line or worse, no line at all.
These after market stall handles are a great option for kites that have worn out their stock handles or didn't come with handles at all. They are compatible with most kite bar systems but be sure that they do not interfere with the actuation of your safety systems before purchasing.
Reinforcing The Hinge.
On the underside of each wingtip of the Peak 1 there is a "Hinge" where two pieces of monofilament are adjoined via a patch of material and kite fabric. Over time, especially if riding with long periods of depower the surrounding material around this hinge can begin to break down. Depending on your general flying conditions or the number of hours you get on the kite this may or may not become a potential issue. Since we get a lot of hours between free riding and school/demo use on our kites we felt it prudent to reinforce this hinge a little. Being mindful of causing a stress riser somewhere else of course. To do this we simple placed a segment of rip stop tape just off center of the hinge. This seems to shore up the material that was breaking down without stiffening the hinge in any way. We saw no further sign of degradation after this little add on.

|
|
Tech Specs.

